08. Warp, Threshold, & Map
Warp, Threshold, and Map to Rover-Centric Coordinates
Work through the steps below and complete the Rover-Centric Coordinates quiz!
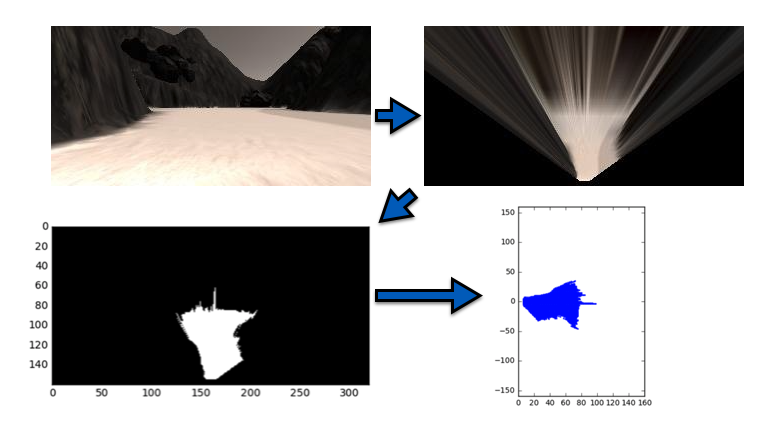
From a raw image to navigable terrain in rover-centric coordinates. Note: the images in the lower left and lower right represent the same data after a change of coordinate system.
To make a map of the environment, you're going to first apply a perspective transform and then apply a color threshold (or vice versa, doesn't really matter). This color thresholded image is now a map of the navigable terrain in front of the rover! Suppose you arrived at the thresholded binary image by combining the functions you wrote in the last two exercises, like this:
import matplotlib.pyplot as plt
import matplotlib.image as mpimg
# Uncomment the next line for use in a Jupyter notebook
#%matplotlib inline
import numpy as np
import cv2

# Read in the same sample image as before
image = mpimg.imread('sample.jpg')

# Assume you have already defined perspect_transform() and color_thresh()
warped = perspect_transform(image)
colorsel = color_thresh(warped, rgb_thresh=(160, 160, 160))

# Plot the result
plt.imshow(colorsel, cmap='gray')
plt.show()
Which will give the following result:
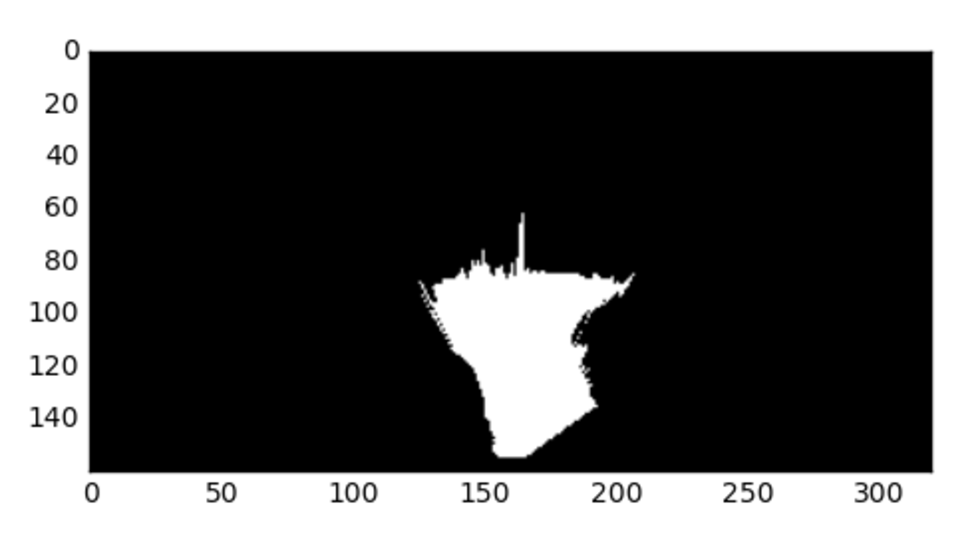
You are now looking down on the rover's world from above and white indicates where you have identified navigable terrain in the view from the rover camera. The position of the rover camera in this image would be at roughly (x, y) = (160, 160).
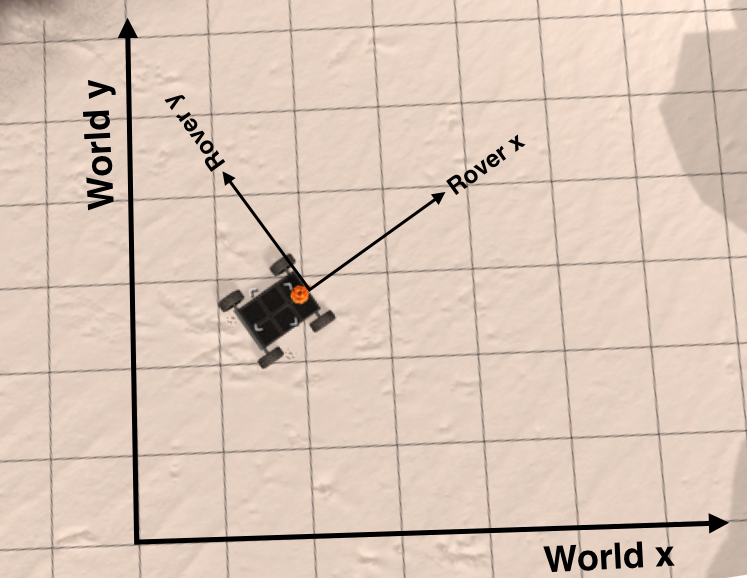
Converting to Rover-Centric Coordinates
The notion of a coordinate system that is fixed with respect to your robot is central to many robotics applications. Such a coordinate system allows you to describe the positions of things in the environment with respect to the robot, in this case, the rover (or more specifically, the rover's camera).
Your task in this next exercise is to extract the pixel positions of all navigable terrain (white) pixels and then transform those values to "rover-centric" coordinates, meaning a coordinate frame where the rover camera is at (x, y) = (0, 0).
You can quickly get the pixel positions in image space like this:
ypos, xpos = colorsel.nonzero()
plt.plot(xpos, ypos, '.')
plt.xlim(0, 320)
plt.ylim(0, 160)
plt.show() 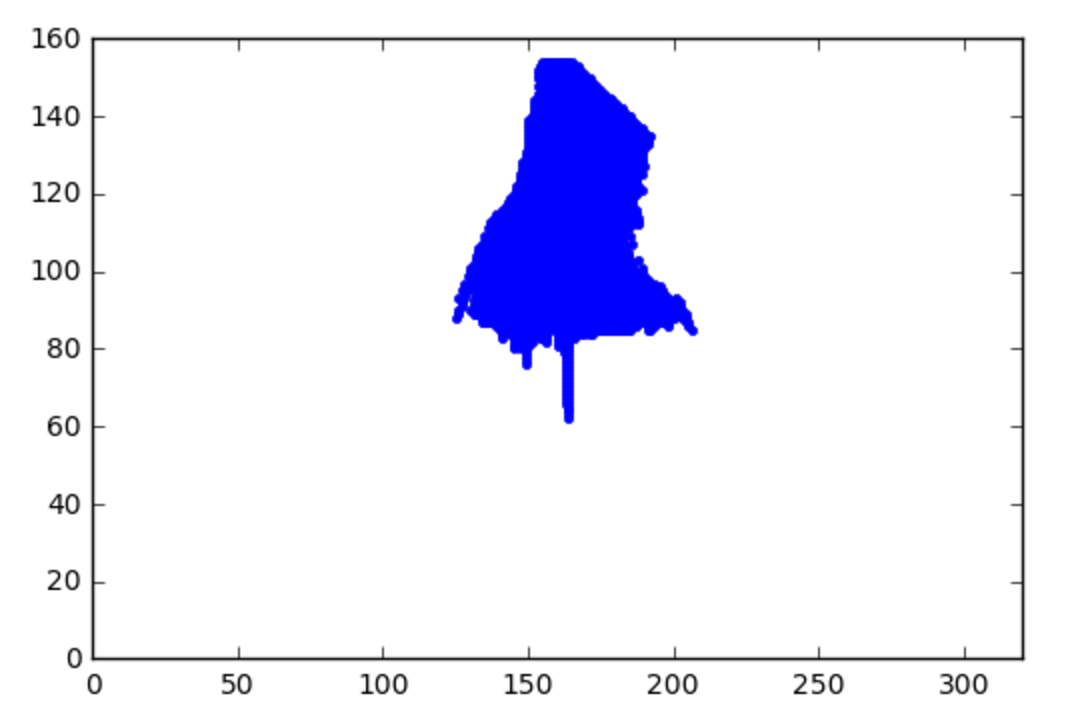
Whoa! But it's upside-down! This is actually the same plot / image as before, we're just looking at it with the origin (0, 0) in the lower left, rather than the upper left, and the y-axis reversed.
Now you have x and y pixel positions in image space of the navigable terrain and all you need to do is convert it to rover-centric coordinates. However, you would also like to swap the x and y axes such that they're consistent with the world coordinate system that you'll eventually be mapping to. The image below shows both the rover-centric coordinate system we will define, and the world coordinate system, which is the reference frame that is fixed with respect to the world and that you will later be mapping to:
In this next exercise your task is to write a function to take in a binary image, extract the x and y positions in image coordinates and then return x and y in rover coordinates.
def rover_coords(binary_img):
# Extract xpos and ypos pixel positions from binary_img and
# Convert xpos and ypos to rover-centric coordinates
x_pixel = [0]
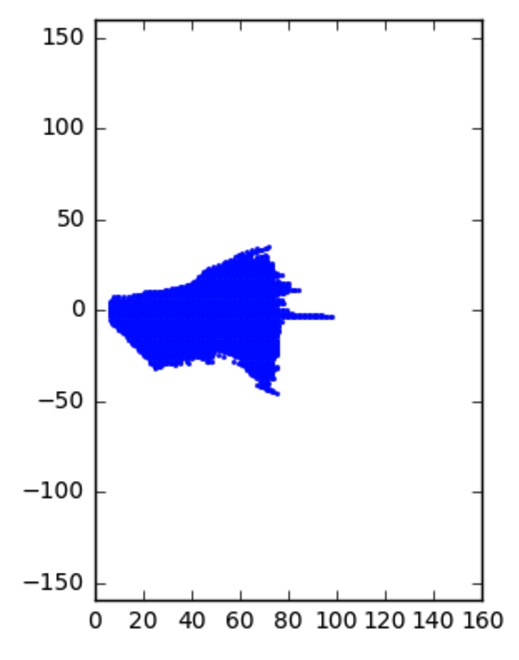
y_pixel = [0]
return x_pixel, y_pixelFor example, the 'rover camera' pixel located at x = 160 and y = 160 will be mapped to x_pixel = 0, y_pixel = 0. After you successfully implement the transformation and plot up x_pixel and y_pixel, you should get a result like this:
This choice of coordinates might not seem very intuitive, but now when the rover is situated in the world at position (x_{world}, y_{world}) = (0, 0) at a yaw angle of zero (yaw is measured counterclockwise from the positive x-direction) then the rover's coordinate frame exactly matches the world frame.
Hint: check out the numpy.nonzero function to get the values from the image!
Start Quiz: